
| 일 | 월 | 화 | 수 | 목 | 금 | 토 |
|---|---|---|---|---|---|---|
| 1 | 2 | 3 | ||||
| 4 | 5 | 6 | 7 | 8 | 9 | 10 |
| 11 | 12 | 13 | 14 | 15 | 16 | 17 |
| 18 | 19 | 20 | 21 | 22 | 23 | 24 |
| 25 | 26 | 27 | 28 | 29 | 30 | 31 |
- 홈어시스턴트
- dynamodb
- raspberry
- 서버리스
- 안드로이드
- homeassistant
- 충전기
- STM32
- 에버온
- 전기차충전기
- flask
- esp8266
- AWS
- 전기차충전
- 급속충전기
- IOT Core
- YMODEM
- 라즈베리파이
- 펌웨어
- everon
- 플라스크
- lambda
- thread
- 디자인패턴
- OCPP
- 파이썬
- Android
- 완속충전기
- 보안
- 전기차
- Today
- Total
Louie NRT Story
[HomeAssistant] ESP8266 CT Sensor 본문
Writed: 12 Mar 2020
Index
1. Component
2. DiagramCircuit diagram
3. Make Device
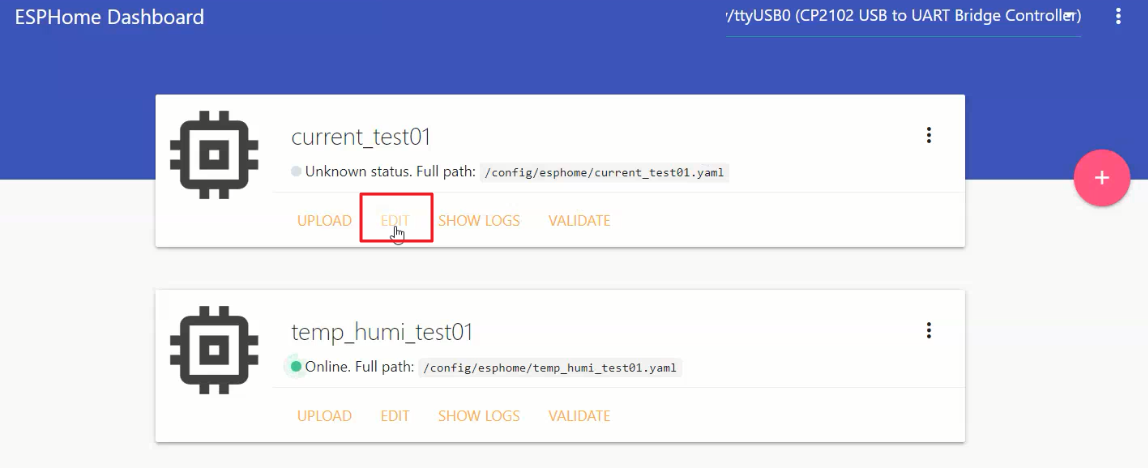
4. Add configuration
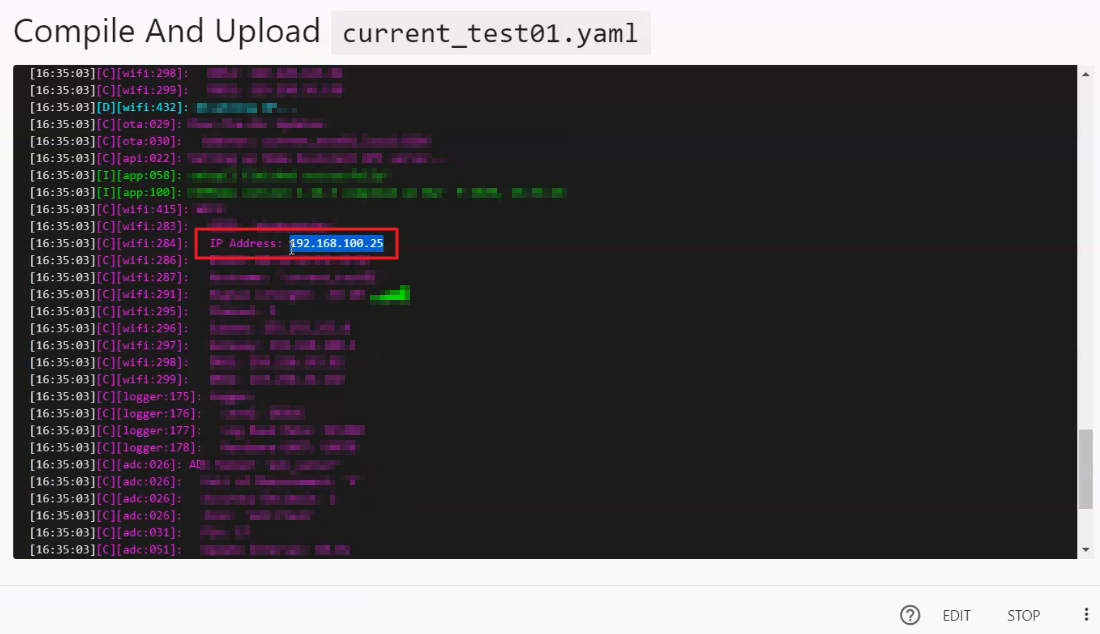
5. Upload
6. Check Device's IP
7. Device IngeSetup Integrations and UI card
8. Filter
9. Picture
1. Component
- RaspberryPi 3B+ is already installed Hass.io
- CT Sensor YHD SCT-013-000
- Resistor 18 Ohms if supply voltage is 3.3v or 33 Ohms if supply voltage is 5v
- 10k Ohm resistors 2ea
- 10uF Capacitor
2. DiagramCircuit diagram
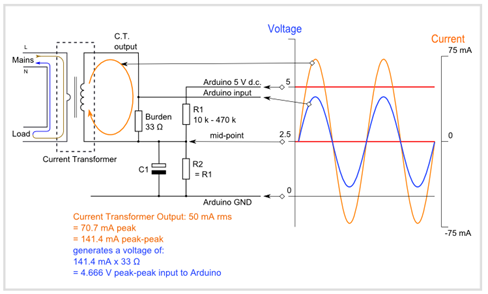
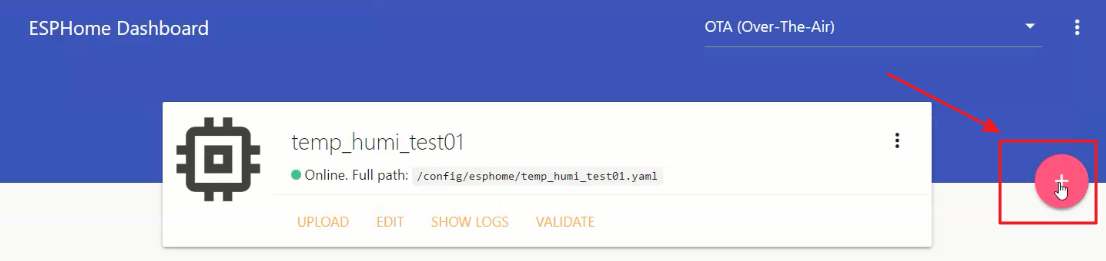
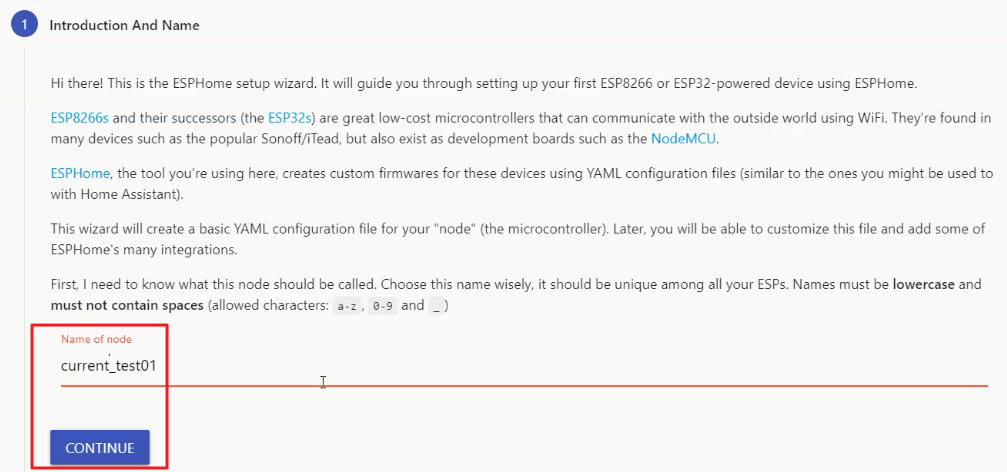
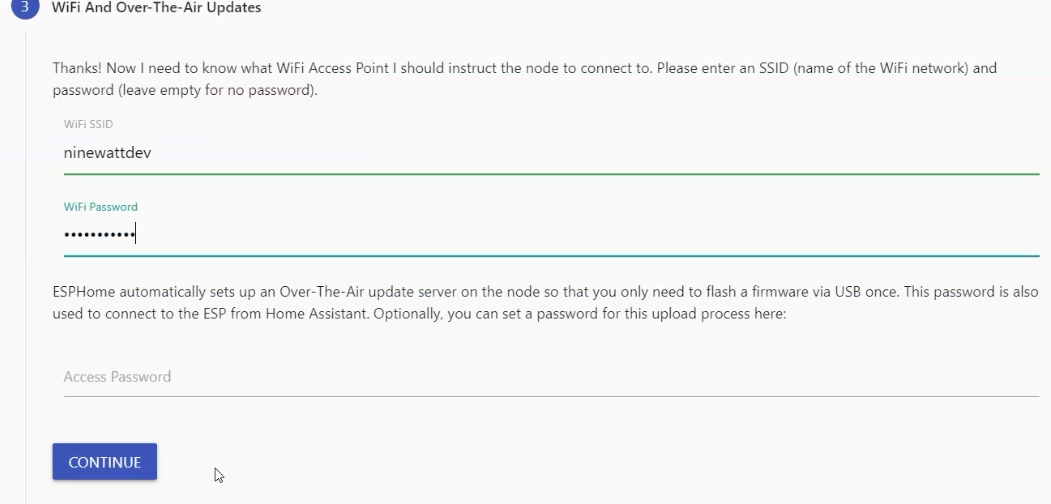
3. Make Device

4. Add configuration
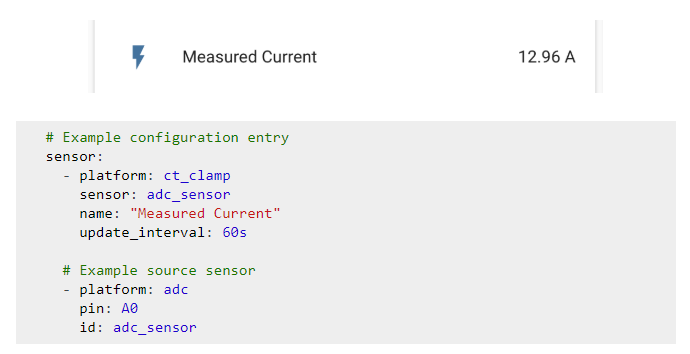
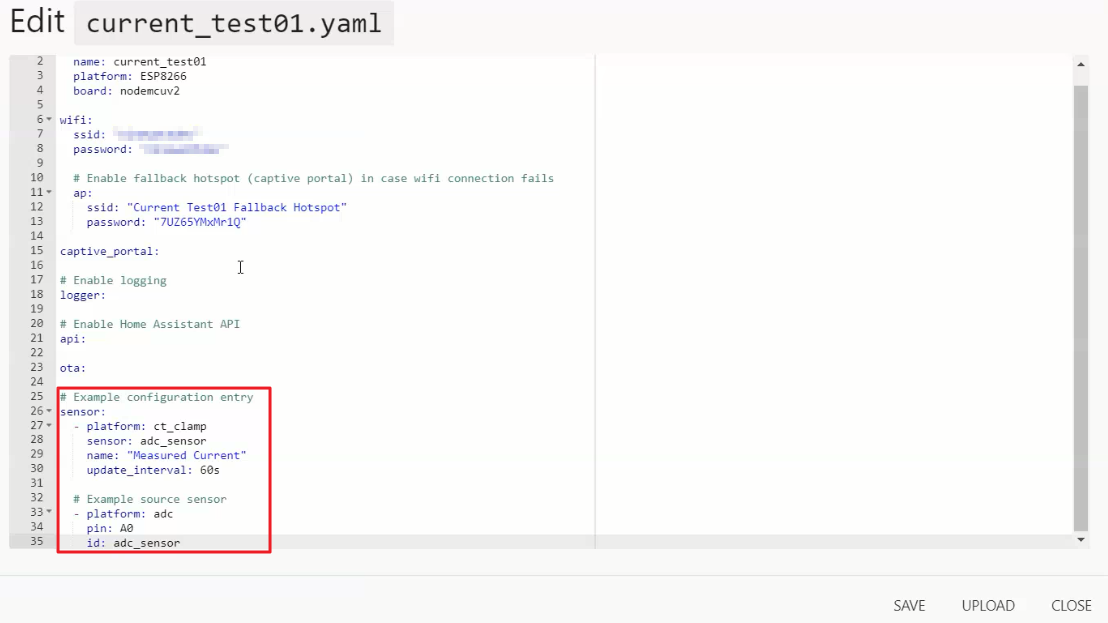
# Example configuration entry
sensor:
  - platform: ct_clamp
    sensor: adc_sensor
    name: "Measured Current"
    update_interval: 60s

  # Example source sensor
  - platform: adc
    pin: A0
    id: adc_sensor
5. Upload

6. Check Device's IP
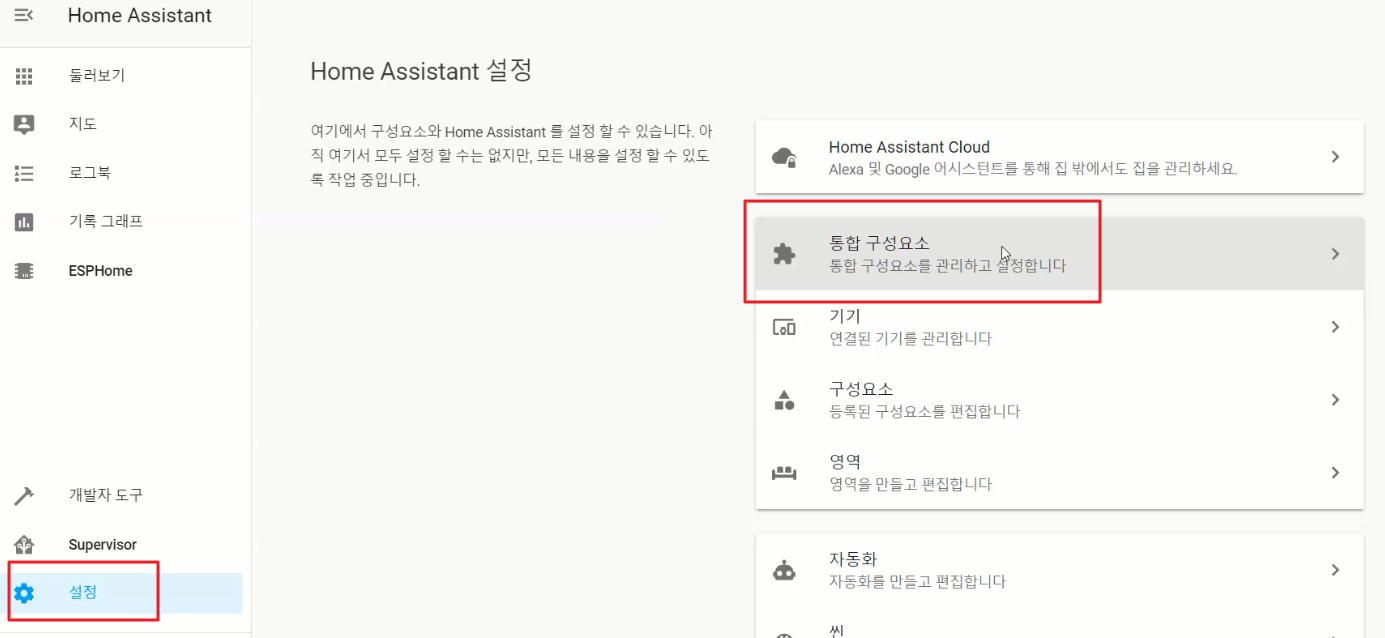
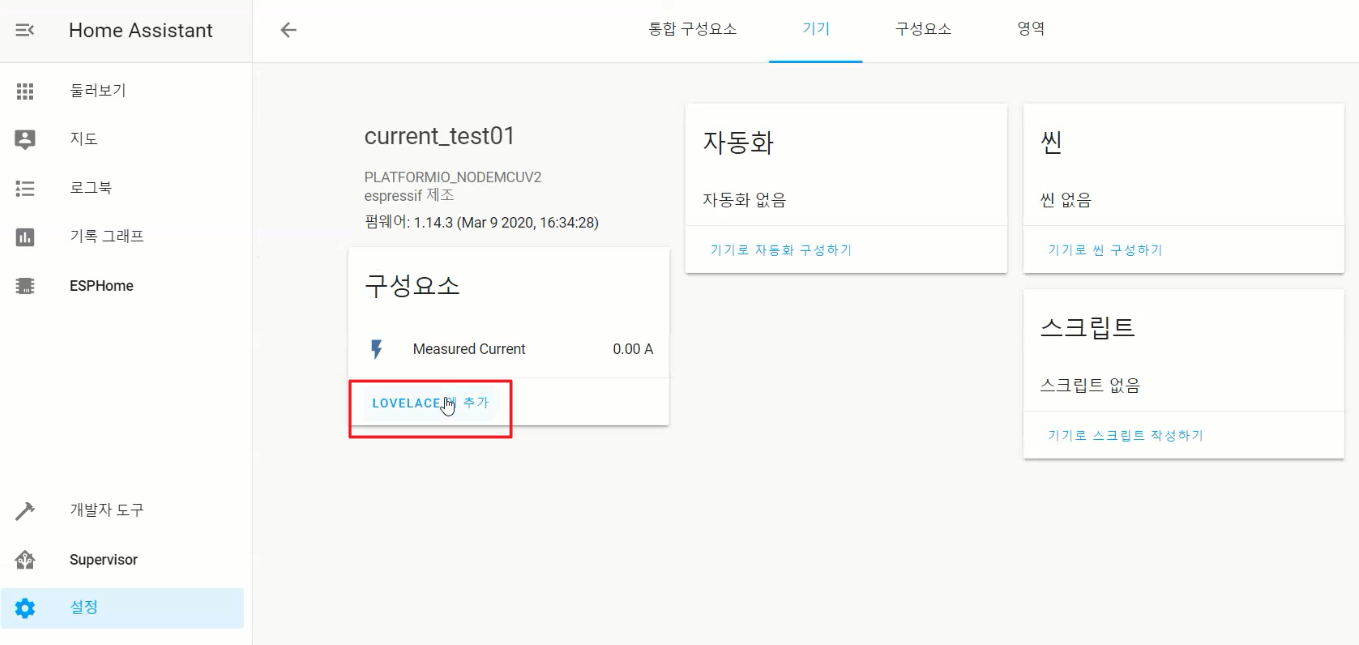
7. Device IngeSetup Integrations and UI card


8. Filter
- The monitoring Data is different other example. Because They used other resistor and filters


9. Picture

Reference:
https://esphome.io/components/sensor/ct_clamp.html
CT Clamp Current Sensor
Instructions for setting up ct clamp sensors.
esphome.io
https://community.home-assistant.io/t/esphome-ct-calmp-sct-013-000-and-nodemcu/174608/9
Esphome ct calmp sct-013-000 and nodemcu
Hi, my setup is working Okay and is repeatable, just trying to find a way to offset the zero. So In my configuration I added another sensor to monitor the raw reading when I have the calibrate linear filter applied to the main Measured Current… platform: c
community.home-assistant.io
https://learn.openenergymonitor.org/
Learn | OpenEnergyMonitor
learn.openenergymonitor.org
'스마트홈' 카테고리의 다른 글
| [HomeAssistant] Manual Installation on a Raspberry Pi ( Docker ) (0) | 2020.03.25 |
|---|---|
| [HomeAssistant] Automation, Scene, Script 구축 (0) | 2020.03.24 |
| [HomeAssistant] ESP8266 Temperature&Humidity Sensor (0) | 2020.03.11 |
| [HomeAssistant] Install Hass.io (0) | 2020.03.01 |
| [HomeAssistant] Install ESPHome (0) | 2020.03.01 |


