
| 일 | 월 | 화 | 수 | 목 | 금 | 토 |
|---|---|---|---|---|---|---|
| 1 | 2 | 3 | 4 | 5 | ||
| 6 | 7 | 8 | 9 | 10 | 11 | 12 |
| 13 | 14 | 15 | 16 | 17 | 18 | 19 |
| 20 | 21 | 22 | 23 | 24 | 25 | 26 |
| 27 | 28 | 29 | 30 |
- 전기차충전기
- Android
- 전기차충전
- STM32
- OCPP
- 보안
- IOT Core
- 에버온
- thread
- lambda
- 펌웨어
- esp8266
- 충전기
- raspberry
- 급속충전기
- 홈어시스턴트
- AWS
- 전기차
- 플라스크
- YMODEM
- 라즈베리파이
- everon
- 서버리스
- flask
- 디자인패턴
- 완속충전기
- 안드로이드
- 파이썬
- homeassistant
- dynamodb
- Today
- Total
목록DHT11 (2)
Louie NRT Story
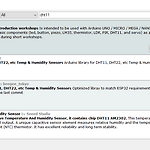
 [HomeAssistant] ESP8266 Temperature&Humidity Sensor
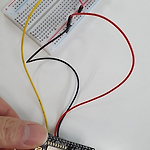
Writed: 12 Mar 2020 Index 1. Component 2. Make Temp&Humi Sensor Device 3. Check ESP8266's IP 4. Setup Integrations and UI card 5. Picture 1. Component 1) Raspberry Pi 3B+ is already installed Hass.io 2) ESP8266 board 3) DHT11 sensor 2. Make Temp&Humi Sensor Device 1) Input device and Wifi information 2) Edit yaml file - If ESPHome Web show "404: Not found" error and can not read ".yaml" file, yo..
 [NodeMCU ESP 8266] DHT11
Writed 17 DEC 2019 Basic setting https://louie0724.tistory.com/218 [NodeMCU ESP 8266] Board (SZH-WFBB-017) Writed: 14 DEC 2019 1. Purchase NodeMCU V2 ESP-12F Wifi Board (SZH-WFBB-017) 2. Install Ardino IDE and Preference 1) Copy Link and paste on textbox URL Llink: http://arduino.esp8266.com/stable/pack.. louie0724.tistory.com 1. ESP8266 and DHT11 Schematic Diagram 1) Define the GPIO that the DH..